How to organize your menu with sections and categories
A well-organized menu helps customers find what they're looking for quickly. Menubly uses a two-level structure — sections and categories — to keep your menu organized. This guide walks you through setting up both, from creating your first section to adding items.
How sections and categories work
Menubly organizes your menu into two levels:
Sections are the top-level groups that appear as main buttons on your menu (for example, "Restaurant Menu" and "Bar Menu")
Categories sit inside sections and group your individual menu items (for example, "Cocktails," "Wine," and "Mocktails" inside the Bar Menu section)
A category can belong to more than one section. For example, "Combos" might appear in both the Restaurant Menu and Today Specials sections.
Here is an example of how a restaurant might structure its menu:
Section | Categories |
|---|---|
Restaurant Menu | Elegido para ti, Combos, Para Picar Algo, Platos, Postre |
Bar Menu | Cocktails, Wine, Mocktails |
Today Specials | Combos, Postre |
On your live menu, customers see sections as the main navigation buttons at the top. When they tap a section, the categories appear as tabs underneath.
Step 1: Open the items tab
Log into your Menubly account
Click on "Menus" in the top navigation menu
Select the menu you want to edit
Go to the "Items" tab
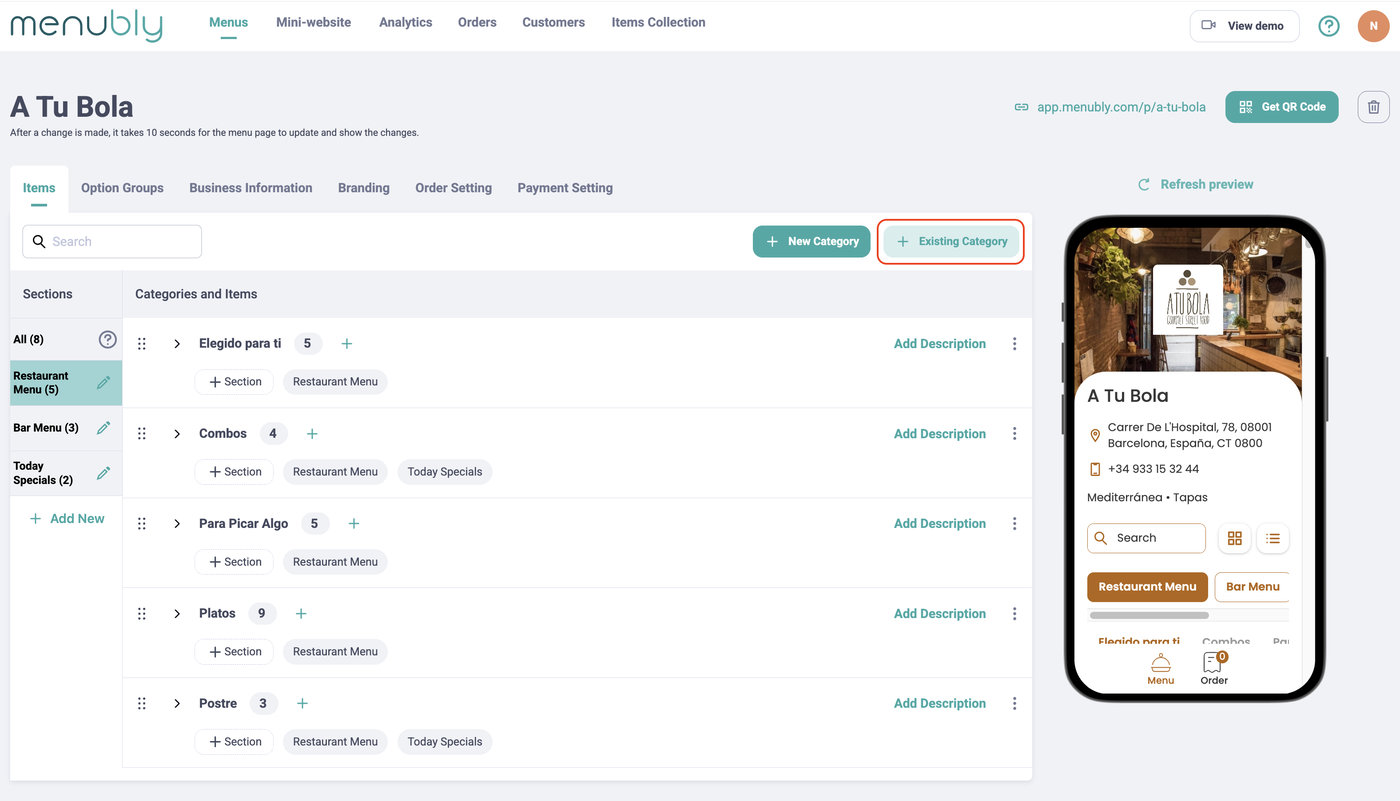
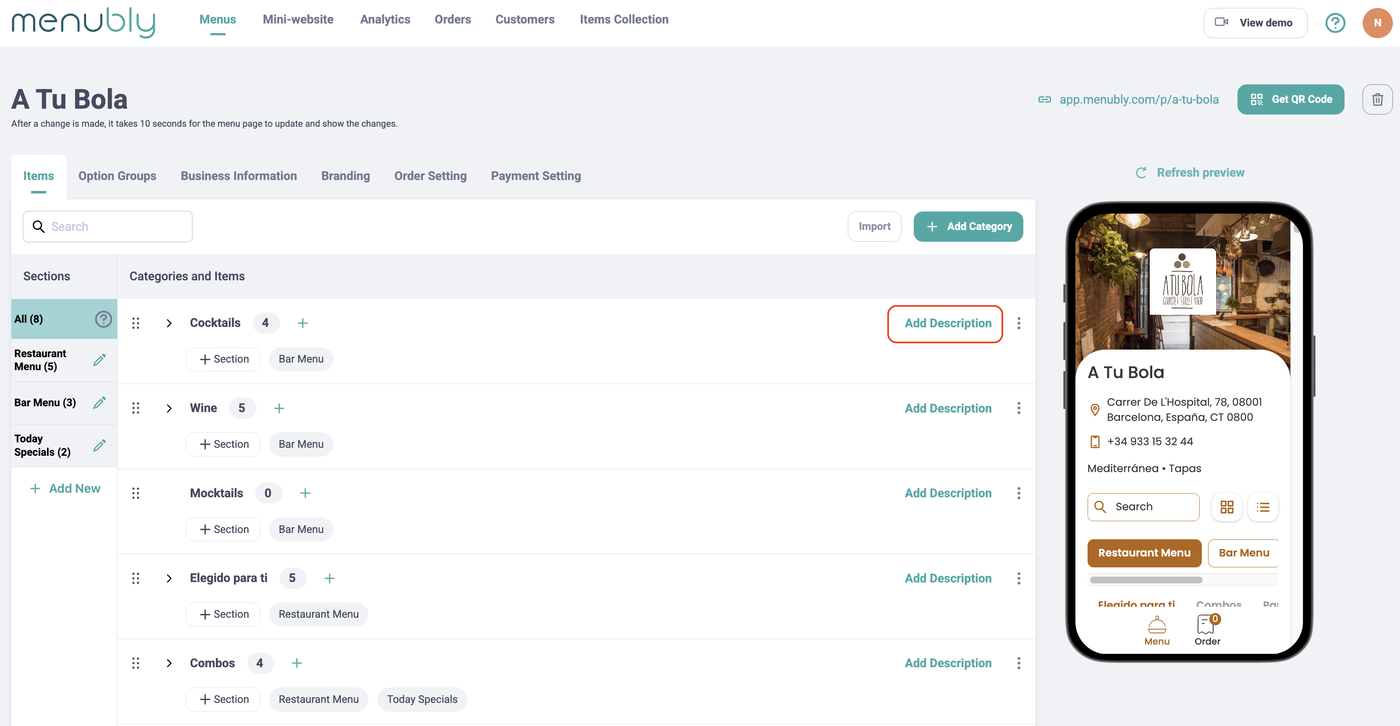
You'll see the Sections panel on the left and the Categories and Items area on the right.
Step 2: Create your sections
Sections are listed in the left sidebar. Each section shows its name and the number of categories it contains.

To create a section, click "+ Add New" at the bottom of the sections panel. Enter a name for the section (for example, "Restaurant Menu" or "Bar Menu").
To rename a section, click the pencil icon next to its name, type the new name, and confirm.
Step 3: Add categories to your sections
Categories appear in the main area to the right. Each category row shows the category name, the number of items it contains, and which section it belongs to.
You have two ways to add categories:
Create a new category — Click the green "+ New Category" button in the top-right corner. Enter the category name and assign it to a section.

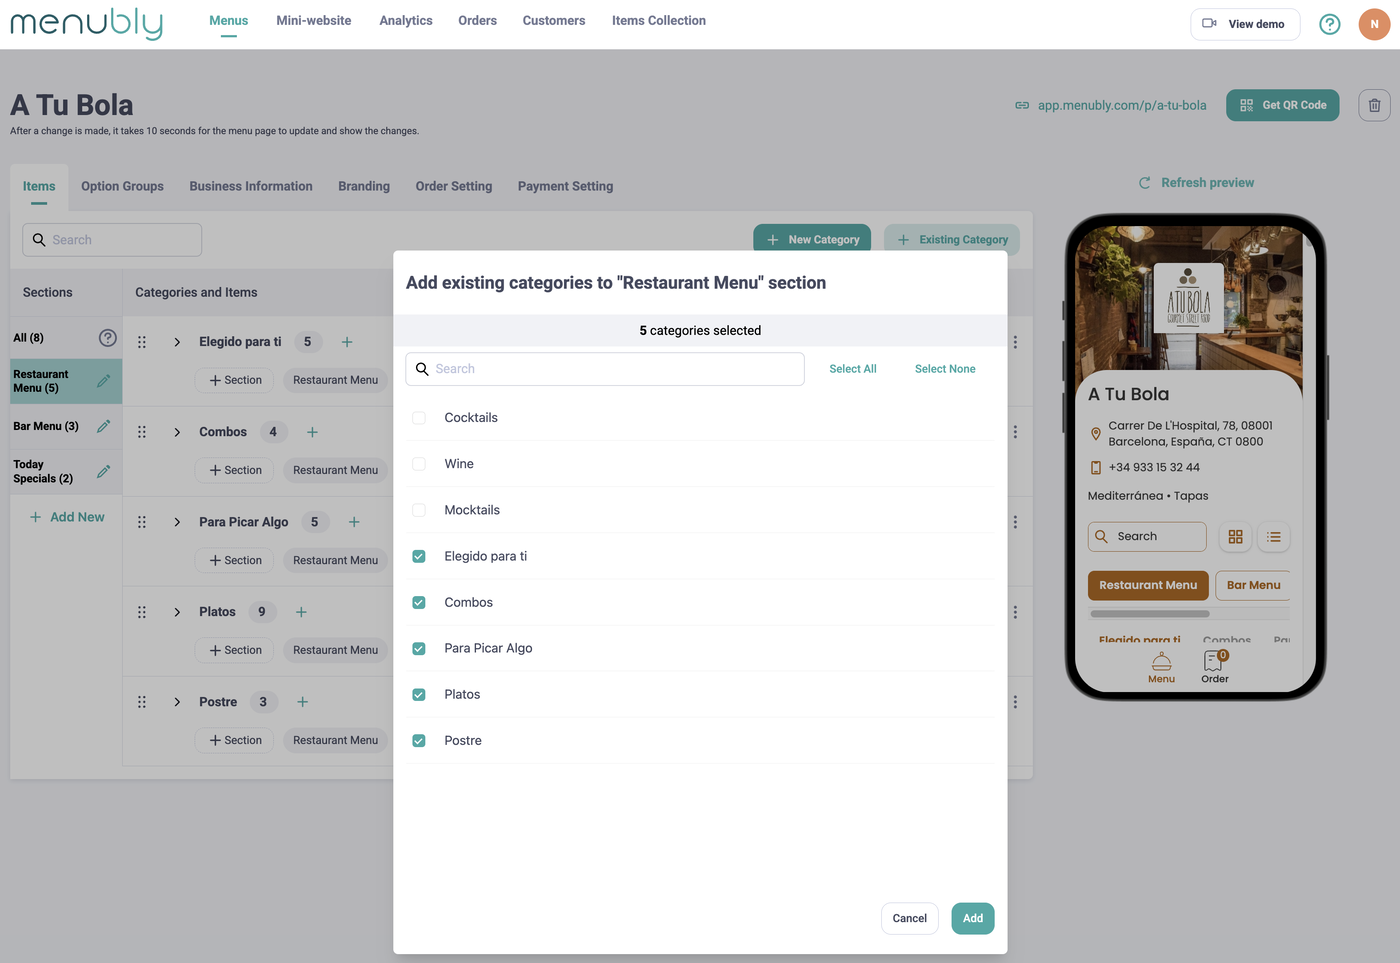
Add an existing category to a section — Click the "+ Existing Category" button in the top-right corner. A dialog opens showing all your categories with checkboxes. Select the ones you want and click "Add." This is useful when a category belongs to more than one section — for example, "Combos" appearing in both Restaurant Menu and Today Specials.
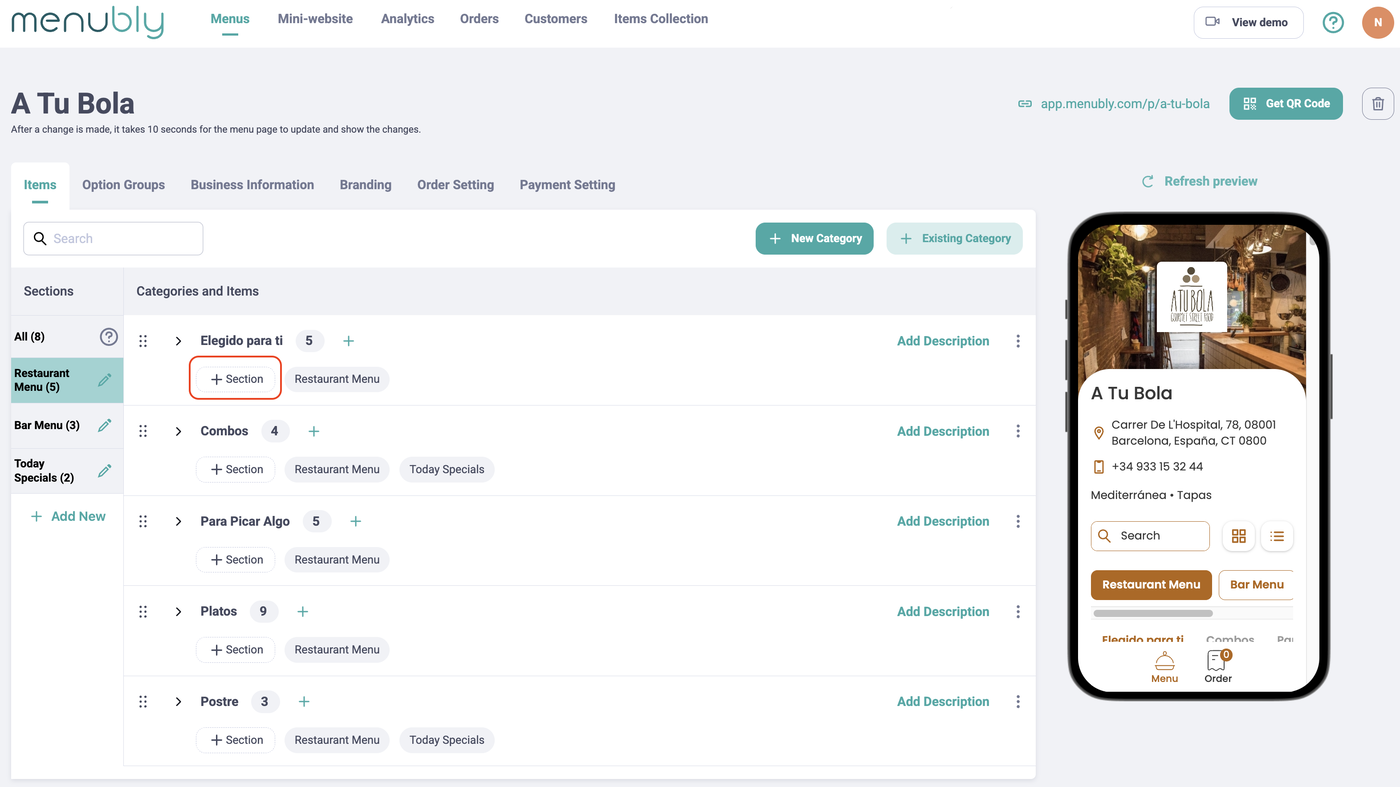
You can also add a category to an additional section directly from the category row by clicking the "+ Section" tag below the category name.
Step 4: Add items to your categories
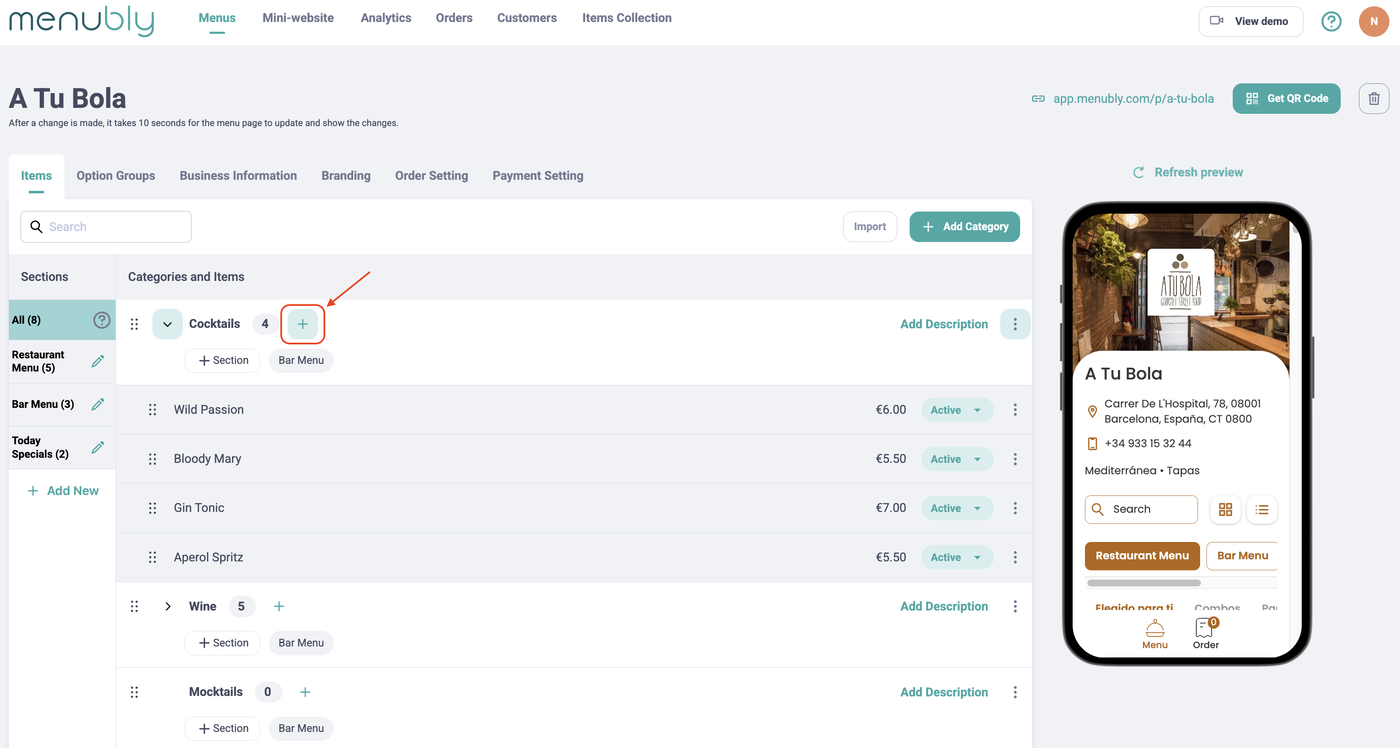
Click the "+" icon next to the category name and item count
Enter the item name and details
The item is added to that category
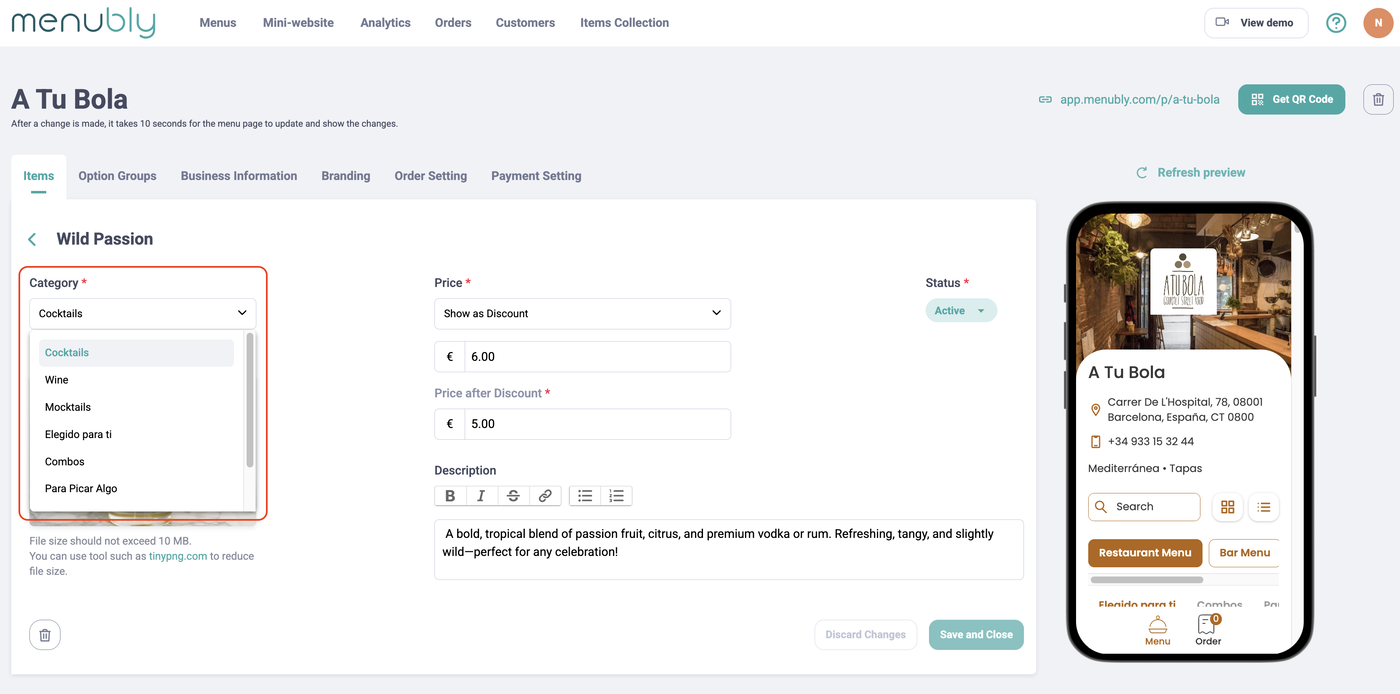
To move an existing item to a different category:
Click on the item to open the item details
Change the Item category dropdown to the new category
Click "Save and Close"
Edit and organize your menu
Once your sections and categories are set up, you can fine-tune them at any time.
Add a description to a category — Click the "Add Description" link on the right side of a category row. The description appears below the category name on your live menu.
Reorder categories — Drag and drop categories using the dots handle on the left side of each row. The order you set here is exactly how customers see the categories.
Filter by section — Click a section name in the left sidebar to view only the categories in that section. Click "All" to see every category across all sections.
Delete a category — Click the three-dots icon on the right side of the category, then click "Delete."
Warning: Deleting a category also removes all items inside it. Move items to a different category first if you want to keep them.
Tips for organizing your menu
Use sections to separate major parts of your business — for example, "Restaurant Menu" and "Bar Menu" as separate sections
Keep category names short and clear — "Mains" is better than "Our Selection of Main Course Dishes"
Put your most popular categories first — customers tend to browse from top to bottom
Use 3–6 categories per section — too many categories can overwhelm customers
Frequently asked questions
What's the difference between a section and a category?
Sections are the top-level groups (for example, "Restaurant Menu" and "Bar Menu") that appear as main buttons on your menu. Categories sit inside sections and group your individual items (for example, "Cocktails" and "Wine" inside the Bar Menu section).
Can a category belong to more than one section?
Yes. You can add the same category to multiple sections using the "+ Existing Category" button or the "+ Section" tag on a category row. For example, "Combos" can appear in both Restaurant Menu and Today Specials.
What happens if I delete a section?
Deleting a section removes the section itself, but the categories inside it are not deleted. They remain available and can still be found under "All" or in other sections they belong to.
Can I reorder sections?
Yes. Drag and drop sections in the left sidebar to change the order they appear on your live menu.
Is there a limit to how many sections or categories I can create?
There is no hard limit. However, keeping your menu simple with 2–4 sections and 3–6 categories per section gives customers the best browsing experience.
Can customers see all sections at once, or do they have to tap each one?
Customers see all section names as buttons at the top of your menu. They tap a section to view its categories and items. Only one section is shown at a time.