How to add add-ons and options groups to menu items
Add-ons and options groups let your customers personalize their orders — choosing sizes, toppings, sides, or any other customization you offer. This guide walks you through creating option groups, adding options, and linking them to your menu items.
What are option groups?
Option groups are the customization choices that appear when a customer taps on a menu item. Option Groups let customers personalize their order before adding it to the cart — like picking a sauce, choosing a side dish, or selecting a size.
Here's an example of what your customers see when you set up option groups:
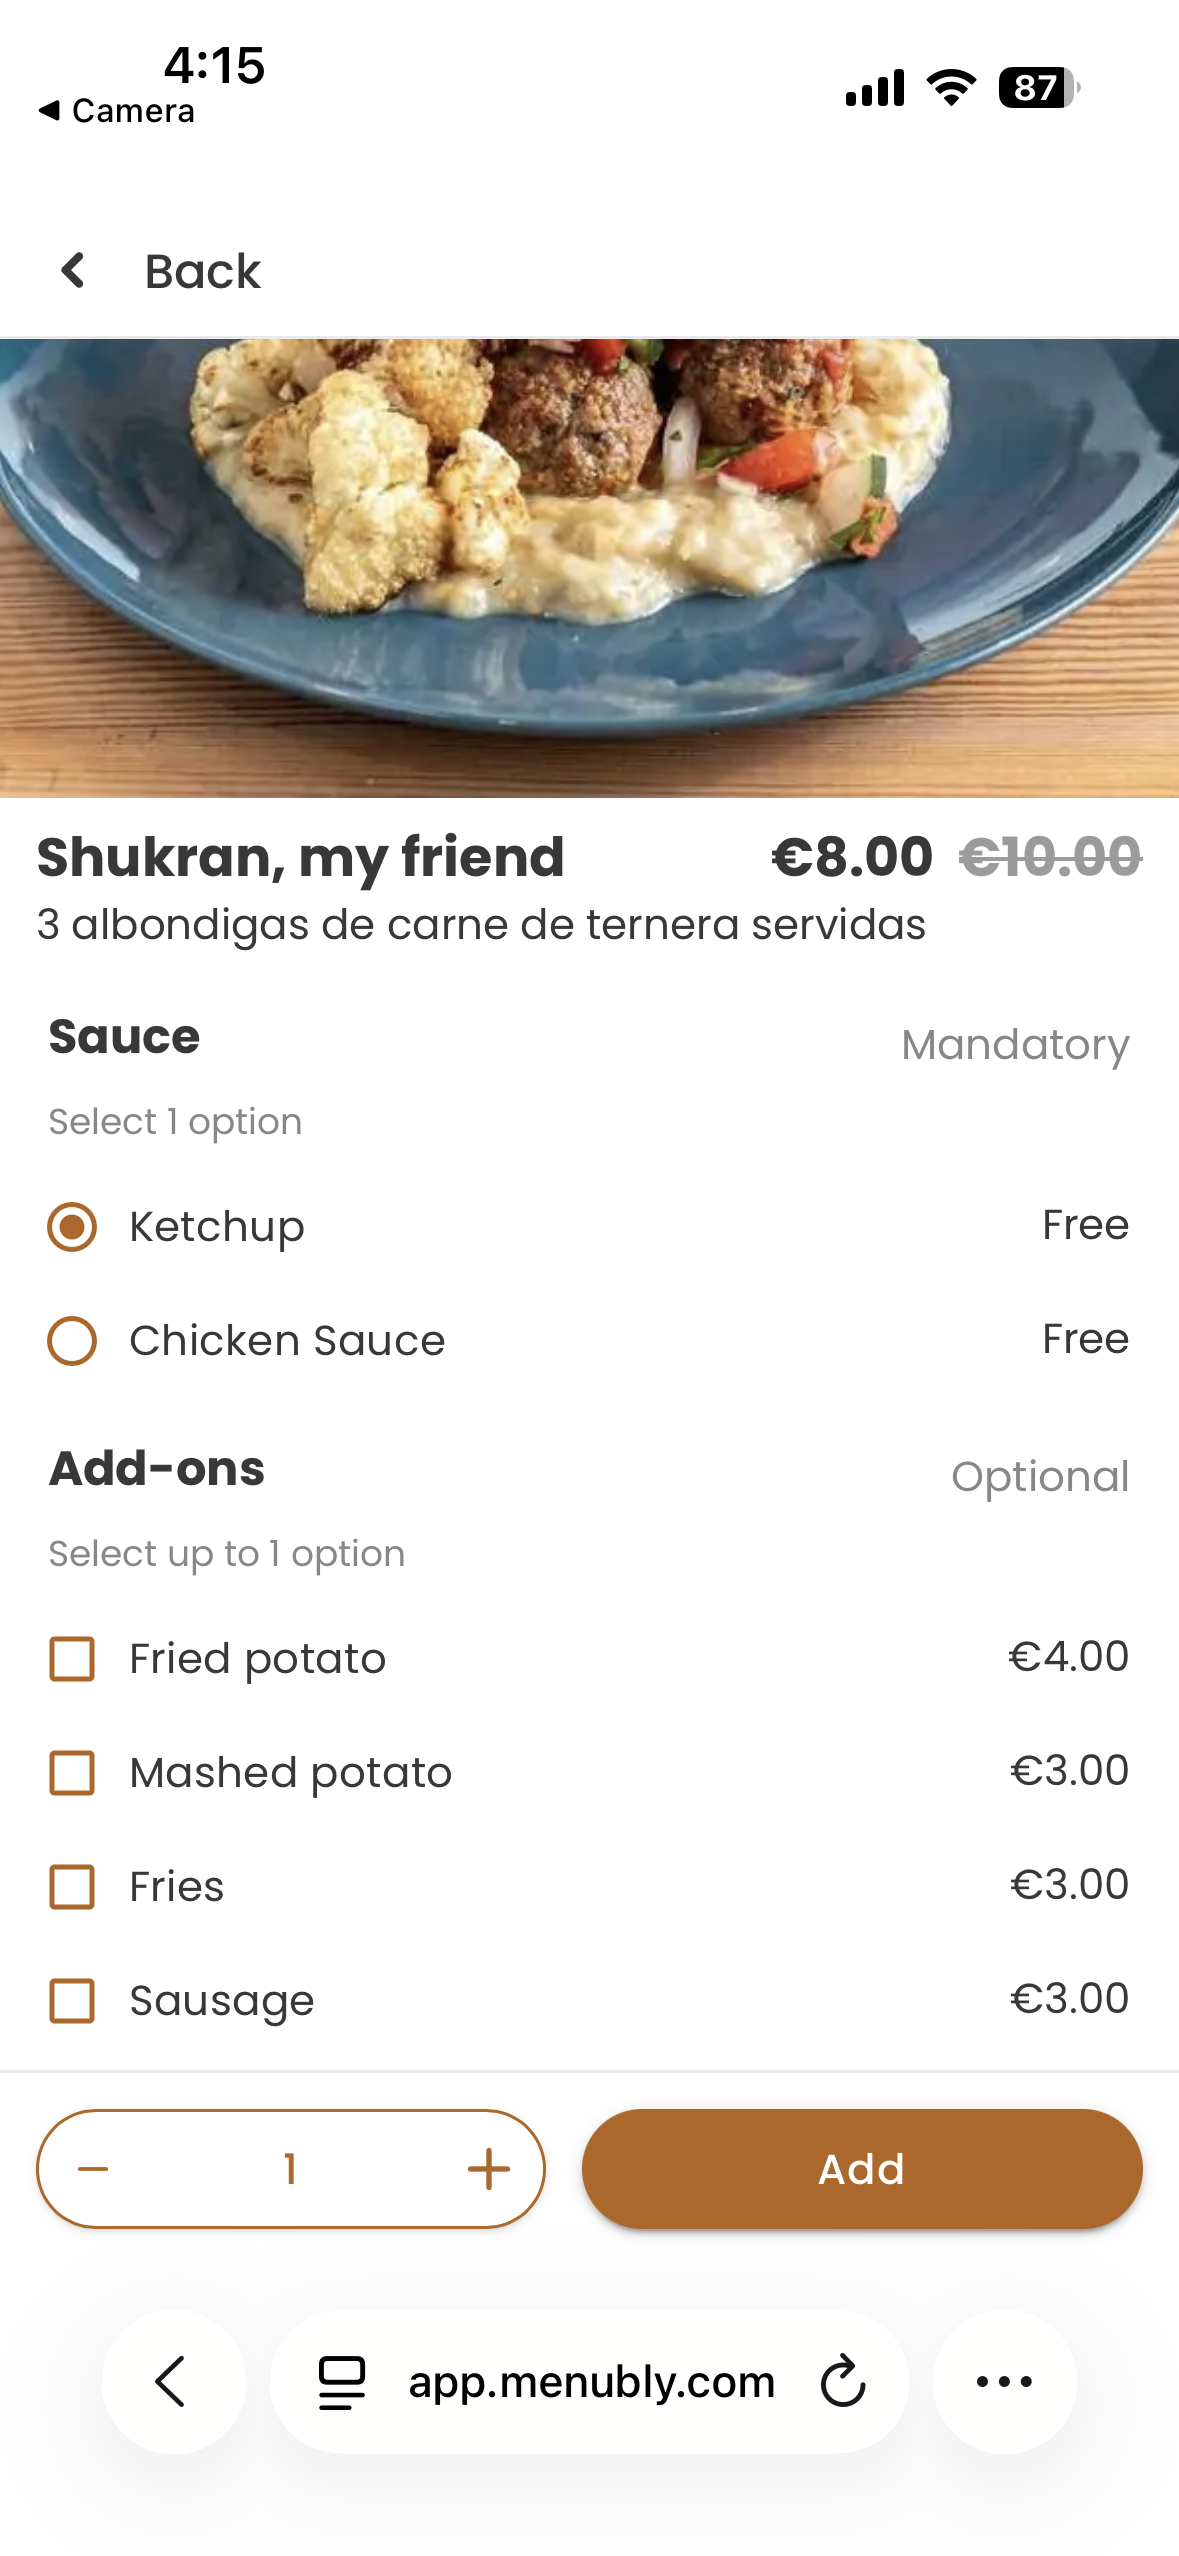
In this example, the menu item has two option groups:
Sauce (Mandatory) — The customer must pick one sauce before they can add the item to their cart. The options (Ketchup, Chicken Sauce) are free.
Add-ons (Optional) — The customer can choose a side dish if they want, but it's not required. Each add-on has its own price (e.g., Fried pot
ato for €4.00).
You can create as many option groups as you need for each item. Here are some common ones:
Size — Small, Medium, Large
Sauce — Ketchup, BBQ, Garlic
Side dish — Fries, Mashed potato, Salad
Toppings — Extra cheese, Mushrooms, Pepperoni
Sugar level — 0%, 25%, 50%, 75%, 100%
Milk — Whole milk, Oat milk, Almond milk
Doneness — Rare, Medium rare, Medium, Well done
Each option can have its own price (e.g., Large +$2.00) or be free. You also control whether the group is optional (customer can skip it) or mandatory (customer must choose before ordering).
Create a new option group
Log into your Menubly account
Click on "Menus" in the top navigation menu
Select the menu you want to edit
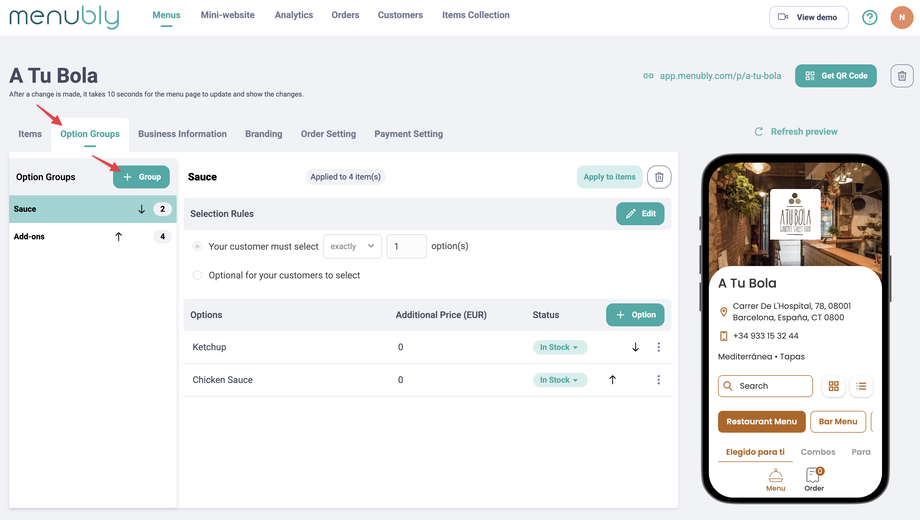
Go to the "Option Groups" tab
Click "+ Group" to create a new option group
Enter a name for the group (e.g., "Size", "Toppings", "Side dish")

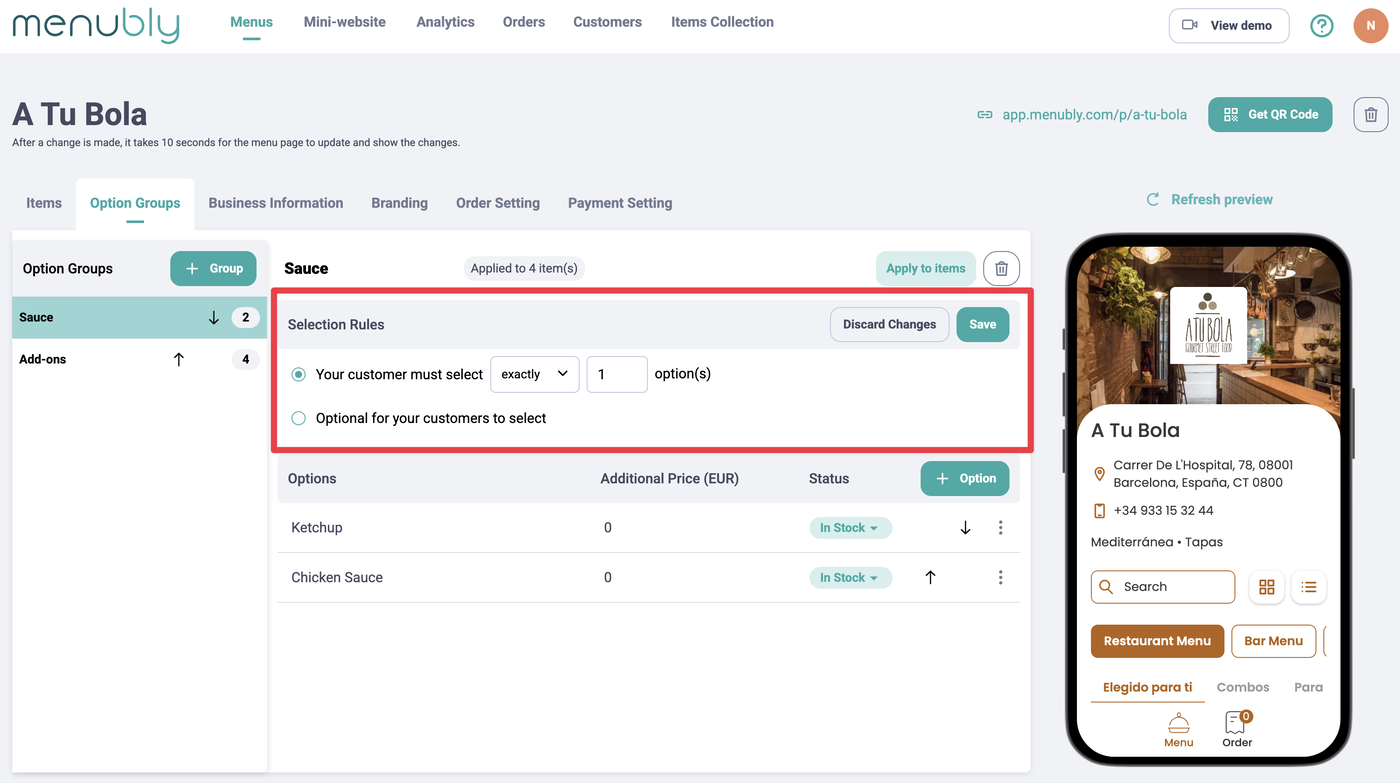
Set the option group rules
Under Selection Rules, you'll see two choices:
"Your customer must select [exactly / at least] __ option(s)" — This makes the group mandatory. The customer must pick the specified number of options before they can add the item to their cart. You can choose exactly or at least, and enter the number. Use this when the order doesn't make sense without a choice. For example:
Pizza size — must select exactly 1 option
Steak doneness — must select exactly 1 option
Bubble tea sugar level — must select exactly 1 option
"Optional for your customers to select" — The customer can pick an option, but they don't have to. Use this for extras that add to the order. For example:
Extra toppings on a pizza — the pizza is fine without them
Side dish with a main course — not everyone wants one
Gift packaging at a bakery — only some customers need it
Click "Save" after setting your rules.
Add options to the group
Click "+ Option" inside your option group
Enter the option name (e.g., "Large", "Extra cheese")
Set the price for this option if it costs extra (leave blank or set to 0 if no extra charge)
Repeat to add as many options as you need

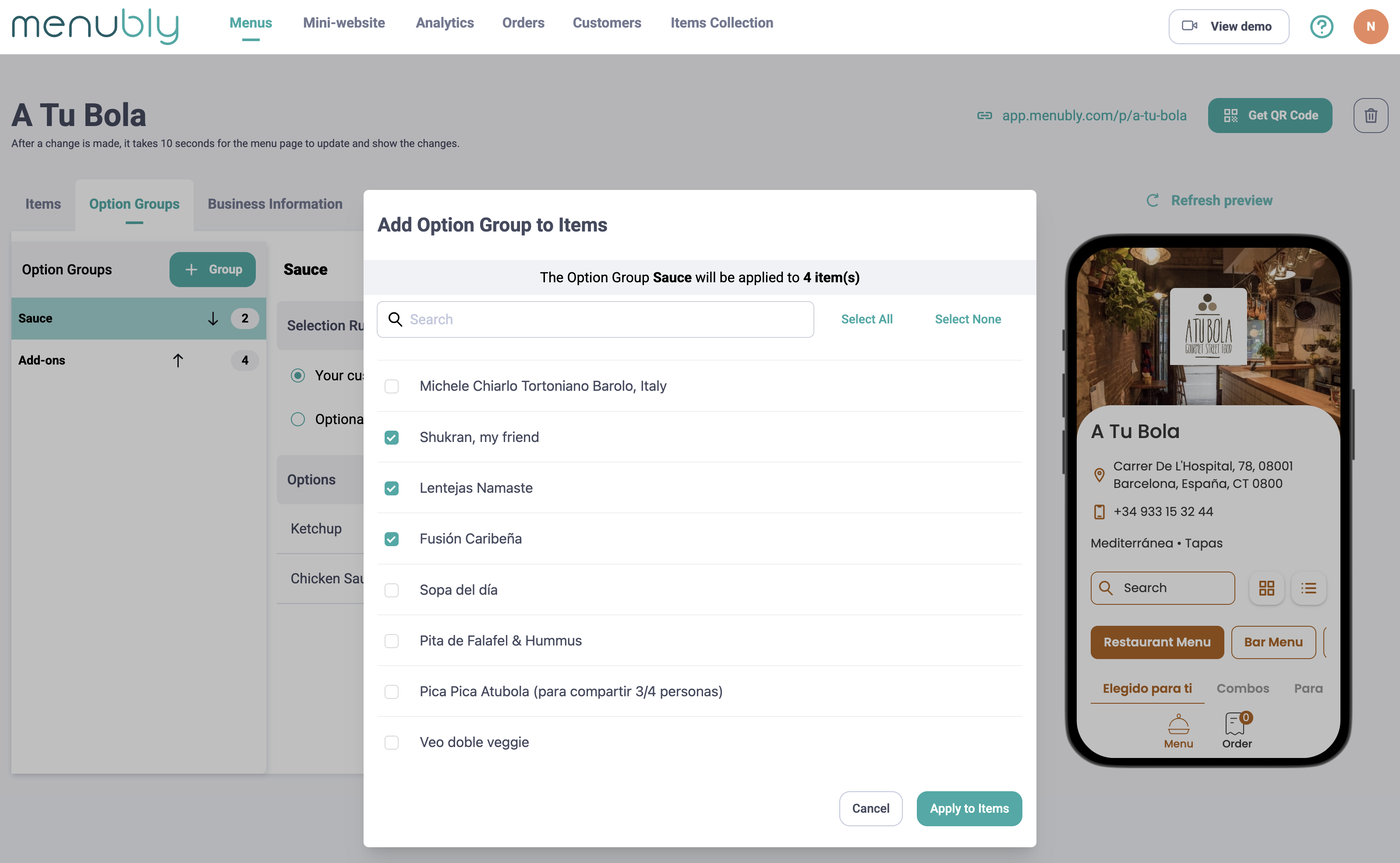
Apply the option group to menu items
Once your option group is ready, link it to the items that should offer these choices:
Click "Apply to items" on the option group
Select the items you want to apply these options to (you can select multiple items at once)
Click "Apply to items" to save
For example, if you create a "Toppings" option group, you can apply it to all your bubble tea items in one step.
Edit or delete an option group
To edit a group name, options, or rules, click on the option group and make your changes
To delete an option group, click the trash icon (🗑) next to the "Apply to items" button
Tips
Use clear, short names for option groups and options so customers can quickly make their choice
Set the right rule — make groups mandatory when a choice is required (like size) and optional for extras (like toppings)
One option group can apply to many items — you don't need to create duplicate groups for similar items
Frequently Asked Questions
Can I apply the same option group to multiple items?
Yes. After creating an option group, click "Apply to items" and select as many items as you want. For example, you can create one "Size" group and apply it to all your drinks at once.
Can I add multiple option groups to one item?
Yes. A single item can have as many option groups as you need. For example, a burger could have "Size", "Doneness", "Sauce", and "Extra toppings" all at once.
What's the difference between "exactly" and "at least"?
Exactly — The customer must select that exact number. For example, "exactly 1" means they pick one option only.
At least — The customer must select a minimum number but can pick more. For example, "at least 2" means they must pick 2 or more options.
Can I set a price for some options and make others free?
Yes. Each option has its own price. Set the price to 0 for free options (e.g., Ketchup — Free) and add a price for premium options (e.g., Fried potato — €4).
Do option groups show up on the menu page?
Option groups don't show on the main menu page. They appear when a customer taps on an item and adds it to the cart — that's when they'll see the options to choose from.
Can I reorder the options inside a group?
Yes. Use the arrow icons next to each option to move them up or down. The order you set is the order your customers will see.
What happens if I delete an option group?
The option group is removed from all items it was applied to. Customers will no longer see those options when ordering.