How to customize your menu design
Your online menu should look and feel like your restaurant. Menubly lets you customize the design of your menu — including colors, logo, header image, and layout — so it matches your brand. This guide shows you how to customize every visual aspect of your menu.
Access the branding settings
Log into your Menubly account
Click on "Menus" in the top navigation menu
Select the menu you want to customize
Go to the "Branding" tab

Customize your colors
In the Branding tab, you can change the following colors to match
your brand:
Theme color: The primary accent color used for buttons, links, and highlights on your menu
Background color: The background of your entire menu page
Click on each color picker to choose your brand colors. You can enter a specific hex code (for example, #FF5733) for an exact match with your existing branding.
Customize your fonts
In the Branding tab, the Fonts section lets you customize the typography of your menu:
Font: The font family used across your menu (for example, Poppins)
Text color: The color of all text on your menu (item names, descriptions, prices)
Add your logo
In the Branding tab, find the Logo image section
Upload your restaurant's logo
The logo appears at the top of your menu page, above your restaurant name
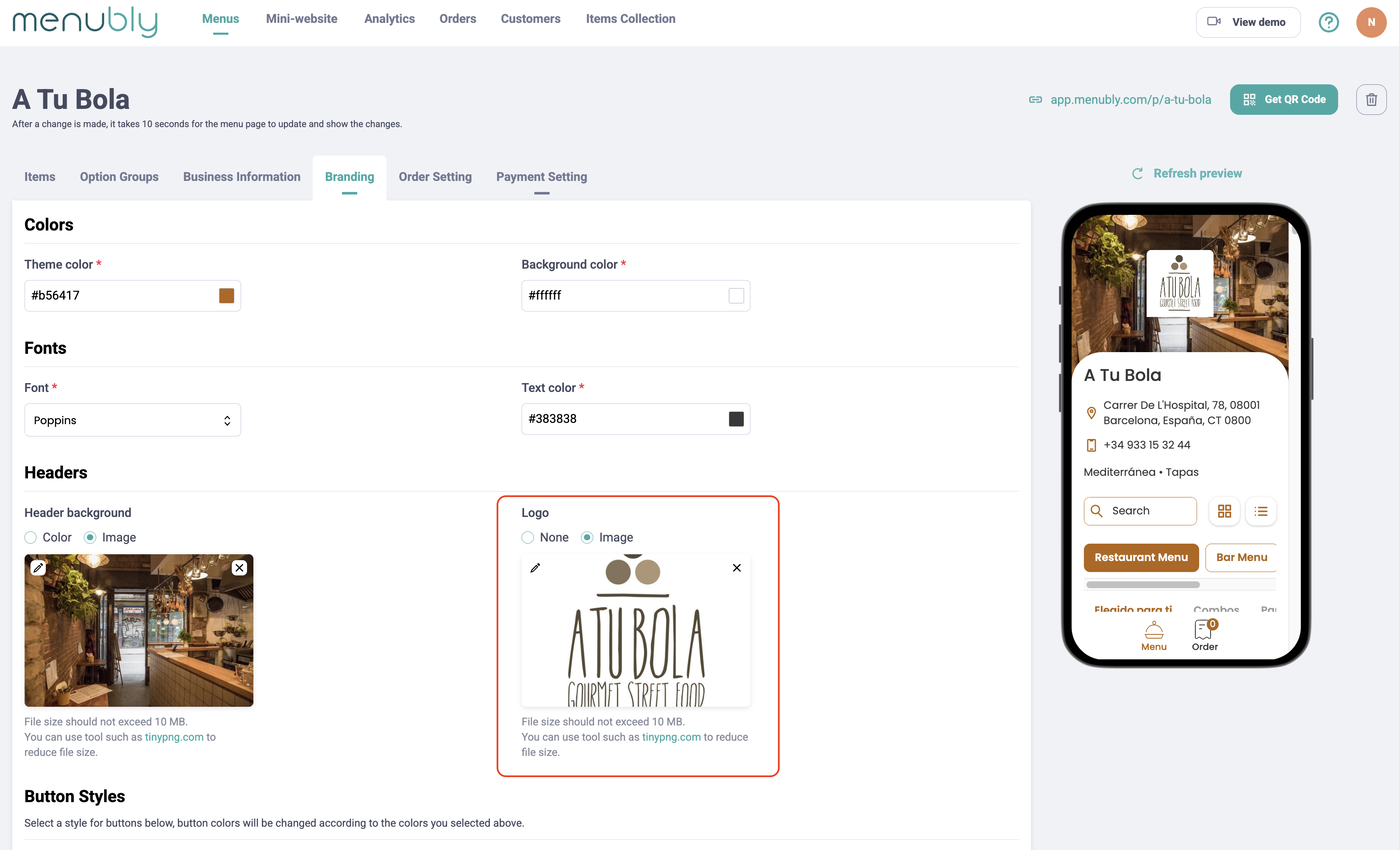
Tip: Use a square or circular logo for the best result. A transparent background (PNG format) works well.
Add a header image
In the Branding tab, find the Header background section
Select Image to upload a photo, or select Color to use a solid background color instead
Upload a large image that represents your restaurant — this works like a cover photo
The header image appears at the very top of your menu, behind your logo and restaurant name

Tip: Use a high-quality, wide image (for example, a photo of your restaurant, signature dish, or dining area). Horizontal/landscape photos work best.
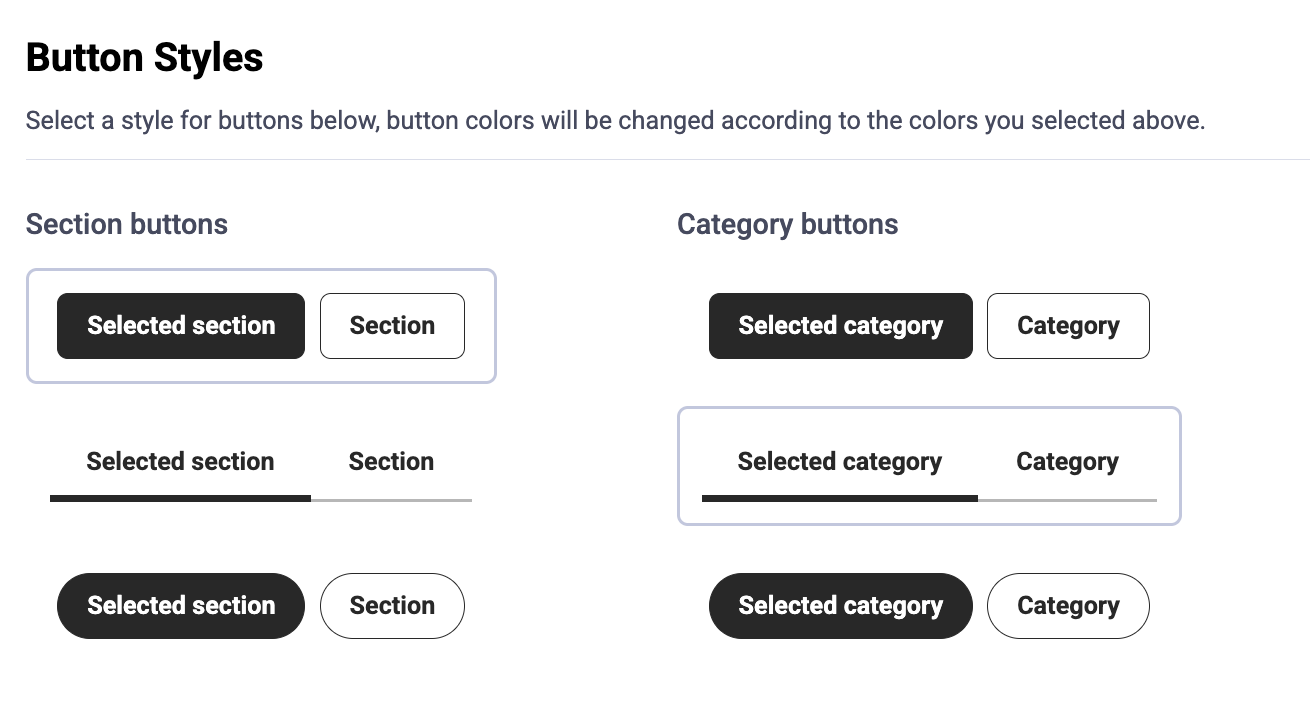
Choose button styles
In the Branding tab, scroll down to the Button Styles section.
Button colors automatically match the theme color you selected above.
You can customize three types of buttons:
Section buttons — Control how your menu sections (for example, "Restaurant Menu," "Bar Menu") appear. Choose from three styles:
Filled rounded buttons (solid background)
Underline tabs (text with an underline indicator)
Outlined rounded buttons (border only)
Category buttons — Control how your menu categories (for example, "Elegido para ti," "Combos") appear. The same three styles are available as section buttons.
Choose a menu button
The Menu button section lets you pick the navigation icon that appears at the bottom of your menu page. You have two options:
Menu: Restaurants — displays a bell/cloche icon
Products: E-commerce or retail — displays a grid icon

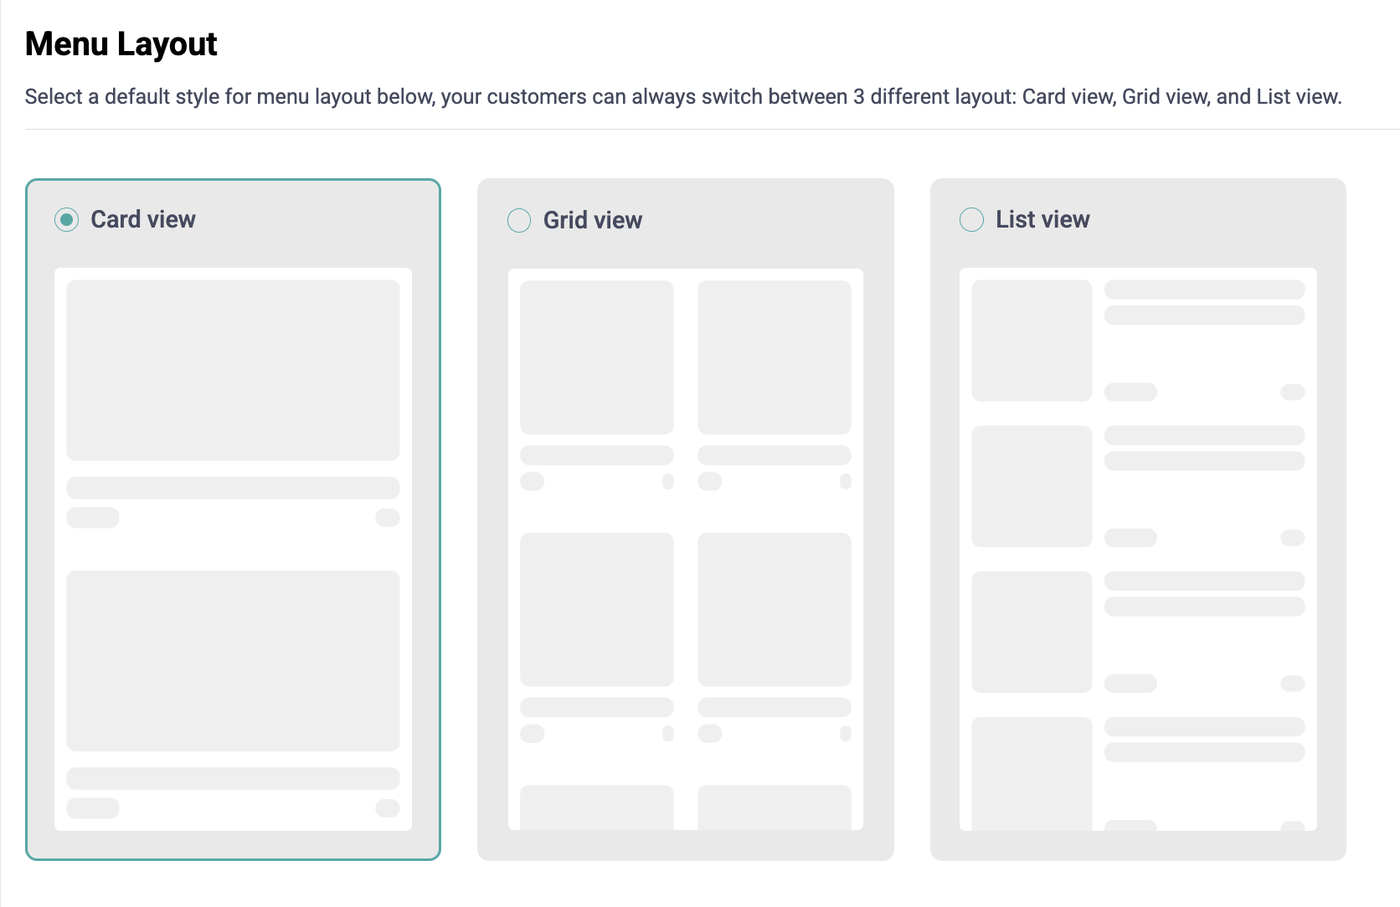
Choose a menu layout
Menubly offers three menu layouts to showcase your dishes. You set a default layout in the Branding tab, and your customers can always switch between all three layouts on the live menu.
Layout | Best for |
|---|---|
Card view | Full-width item cards with large images — great for highlighting individual dishes |
Grid view | Two-column grid with photos — fits more items on screen at once |
List view | Compact rows with small thumbnails — ideal for text-focused menus with many items |
Preview your changes
After making changes, click "Save" and then click your public menu URL (top right corner) to see exactly how your menu looks to customers. Your menu is mobile-friendly and automatically adjusts to look great on phones, tablets, and computers.
Customize your business information
Your menu also displays business details that you can customize in the Business Information tab:
Go to the "Business Information" tab
Edit the following fields:
Place name — Your restaurant's name
Phone number — Your contact number
Address — Appears below your restaurant name
Currency — The currency shown for prices (USD, EUR, GBP, etc.)
Header Note — A short message displayed above the menu (for example, "Free delivery on orders over $30!")
Foot note — A note displayed at the bottom of the page (for example, "All prices include VAT")
Click "Save"
Tips for menu design
Keep it consistent — Use the same colors and logo as your physical restaurant for brand recognition
Less is more — A clean design with 2–3 colors looks more professional than a rainbow of colors
Use high-quality photos — Blurry or dark images can hurt the customer experience
Test on mobile — Most customers will view your menu on their phone, so always preview on mobile
Match your vibe — A fine dining restaurant might use dark colors and elegant fonts, while a casual burger joint might use bright, fun colors